CS 0: Tools & Set Up
2016-06-13 · 9 min read
This guide is designed for users on MacOS
Intro
Before we get started, lets make sure you understand what we will and won't be working on.
Tech writers love to write about the "best" programing language to learn, but the truth is, it doesn't matter. Learning a programing language is NOT like learning a spoken language. Almost all programming languages share the same mental model, the most important thing to learn is ideas shared across the languages. A lot of beginners get caught up in the "best" language. Don't worry about it. As you learn more you will find out which ones are best for the situation. Worry less about "best" and more about understanding the concepts behind one.
In this tutorial, we will be looking at some of the very basic ideas in computer science using Python but will also look at the tools behind working with code and programing.
Why Python? Python has simple syntax, a large and supportive community, and lets us understand the ideas of computer science without getting caught up with language details. There may be some example where other programming languages will be mentioned or shown, but we will explain that later. Again, there is no "best" language, we just have to start somewhere.
Setup
Before we get started writing our first line(s) of code, there are some things that we need to go over.
The Command Line
The Command Line is the fastest way to give text commands to your computer. Later when I say run a command (ex: run echo "hello"), it means to type it into the command line. It can do a lot but we are going to keep to the basics.
On MacOS the command line is called Terminal and can be opened by searching for terminal or opening it in the Applications/Utilities folder. You should get a window like the one above. This is a bash shell, these are the same shells as UNIX. If you don't know what that is, don't worry. Some basic but important commands for Terminal are:
cd - Change directory cd [directory]
All directories on MacOS are separated by a forward slash /, your Desktop folder is located at /Users/[username]/Desktop and MacOS system files are located at /System. It is important to know that MacOS is case sensitive meaning /folder is not the same folder as /Folder. If you need to access a folder with spaces in it make sure to put the folder name is quotes, ex: cd "folder 1". Go ahead and try to navigate to Desktop folder. You can navigate to the directory above the one you are in by using two periods, ex: cd ...
ls - List files in a folder ls
To look at the files or children folders in a directory, type out the ls command. This will help you navigate around the file system of your computer. When running ls, . is your current folder, and .. is the parent folder of the current folder.
mkdir - Create a new folder mkdir [folder name]
All folder in MacOS (and UNIX) have a hierarchy file structure, everything up to the root folder / has a parent folder. mkdir creates a new folder as a child element of the folder it was run in.
We will get into some more commands for the bash shell that we access using Terminal later, so don't worry if you feel a little lost. It is okay to Google are reference this and other online docs often.
Homebrew
On MacOS there are numerous ways to install software, while most graphic applications use the App Store or disk images .dmg. Homebrew is a great too that can be used to install software packages without having to download disk images and run scripts. We can install packages using brew install [package name]. We will use this later to install python. You can install Homebrew by running the following:
/usr/bin/ruby -e "$(curl -fsSL https://raw.githubusercontent.com/Homebrew/install/master/install)"
in the terminal prompt. Find more instructions at brew.sh. You can then update packages by running brew update.
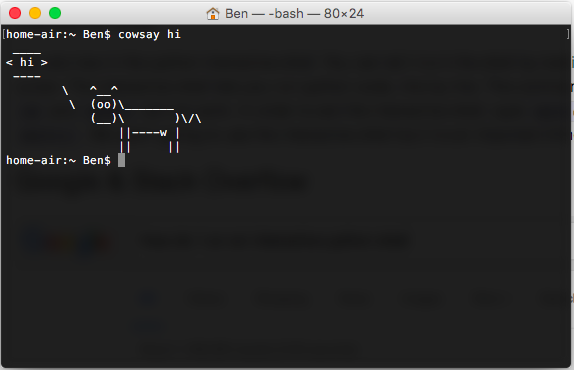
Lets give it a try with the cowsay package. cowsay is a fun command line package that shows a text based cow with the words you enter. To start you need to install cowsay, lets use our newly installed brew to do this.
brew install cowsay
Now that we have cowsay lets try it out! Enter the command
cowsay "hi"
You should get a window like the one below.
Text Editors
While we can run text editors on the command line like Emacs or Vim, they have a learning curve of their own. We are going to use a text editor application. There are a few options out there for text editors like VM Code or Sublime, the one I recommend most is Atom, which is maintained by Github (which we will talk about soon).
Atom
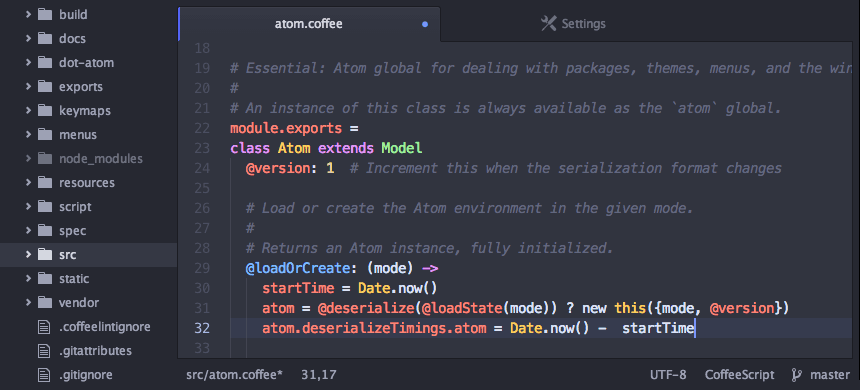
While Atom is simple to use, it has lots of extensions that can be added to it. We won't get into those right now, but there is a lot of material on Google about them. One important think to do is save all your file with an extension on them, we will talk more about this later. You can install it for MacOS & Windows at atom.io.
This is where we will be writing all of our code. Try and create a test.txt file and save it to your Desktop. We will start our coding in this soon.
Python
Now that we have our text editor and our command line set up, it is time to install Python. There are two versions of Python right now, python 3.5 or python 2.7. Python 3.5 is the newest version. 2.7 is kept around due to compatibility issues. Make sure you install python 3.5, there are code breaking differences.
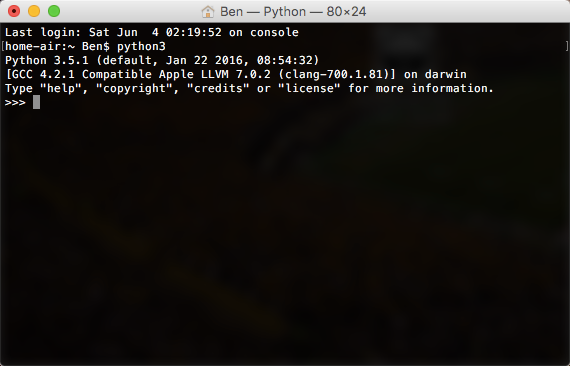
If you are using MacOS and installed Homebrew earlier, you can use brew install python3. If it doesn't show up when you type python3 into the command line, run brew link python3 to link the python files to the command line (don't worry about the details of this). You can test that python3 is working by typing python3 into Terminal. If you get the output above, we are ready to move on. Do not close the Terminal window, we are going to use it.
Interactive Shell
You are now in the python interactive shell. You can tell it is in the shell by looking at >>> before your cursor. The interactive shell lets you run python code, line by line. The commands we used earlier like cd and mkdir will not work. In order to exit the interactive shell, type exit(). Go ahead and run exit(). We aren't going to use the interactive shell but it is an important thing to know about.
Google & Stack Overflow
Programming is a skill that requires a lot of research. You need to be able to look things up and continuously increase your understanding. Even the best engineers in the world need to look things up. Don't be afraid to Google anything you don't understand. While Wikipedia can be great for learning the basics of other topics, it isn't the best place to look up programing info. A lot of the information is about the theory of the underlying idea. While this is great if you are taking Computer Science theory classes, it is unneeded to learn how to program.
Stack Overflow is a great place to look up explanations to problems you may run into. You should create an account so you can keep track of things you have found. Try to search for a question before you post. Stack Overflow is know to be harsh to new users because they are known to repeat questions. Try not to let it discourage you if they are rude, it happens to most people. While they have a search tool on the site, it is usually best to search on Google and click the first Stack Overflow link.
Remember to run things for Python 3.x, not Python 2.x, they are not the same!
Writing your first lines of code
The time has come for us to write your first lines of code. They are going to be simple but should test that your machine is set up.
Open up Atom and save a file on your Desktop named first_code.py. Make sure to have the .py extension, it does matter. We are going to run our first Python script that checks what version of Python we are running. Lets type the following:
import sys

print("hello, we are running " + sys.version)
import sys tell python to include the system library into the code. This lets us use code that others have written in our program. print(), is a function (we will go over those next, don't worry) that prints to the command line anything we put in it. So print("We are running python " + sys.version) prints out "We are running python" and sys.version which is the value of the version of python (We will go over how it has values). If you are a little lost, don't worry! We will get more into all of this as we go, just worry about it working for now.
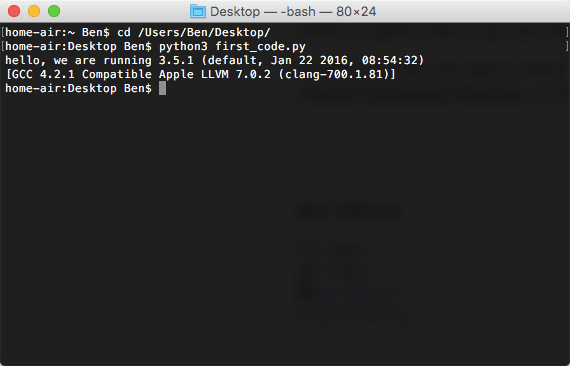
In order to run this, we need to save the file and go to the Desktop cd /Users/[username]/Desktop in Terminal. Now that we are on the Desktop, we can run the file we have written. python3 first_code.py should run and give us the above result (If it is a higher or slightly lower version of Python, don't worry):
Conclusion
Nice job! You have the tools & setup ready to program. See codecademy.com for more learning resources.